Daily Maintenance <DWX-53D>
Cleaning After Milling Finishes
Clean the machine every day after milling finishes. Using the machine without sufficient maintenance may affect the milling results and may even damage the machine.
Required items
Brush | Cloth for care |
For daily maintenance, please clean the following three areas:
- Milling area
- Tool area
- Milling bur/adapter
Cleaning the Milling Area
Reference video
1. Check that the machine is in the ready status.
If the status light at the top of the machine or in the milling area is lit in blue, the machine is in standby.
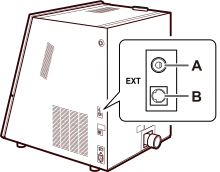
2. Make sure that the dust collector is connected to the machine.
When using a dust collector with built-in linking function, make sure the linking cable is connected to the expansion port on the machine.
3. Open VPanel.
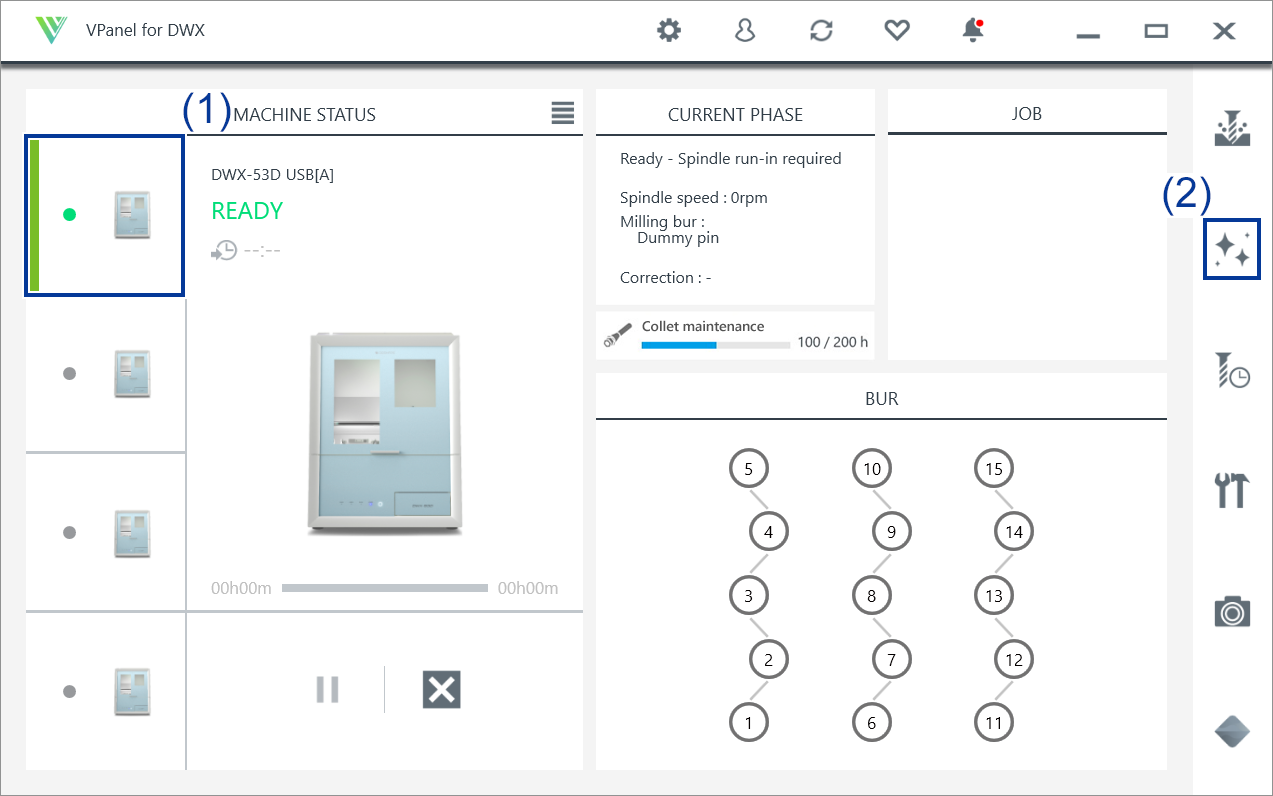
4. Open the [Milling area cleaning] window.
(1) Select the machine you want to operate in the VPanel top window. When you have connected multiple machines, you can switch a machine by clicking its image under [MACHINE STATUS].
(2) Click  . The [Milling area cleaning] window will be displayed.
5. Turn the dust collector on.
- When using a dust collector with built-in linking function.
The dust collector turns on automatically. - When using other dust collectors.
Turn the dust collector on manually.
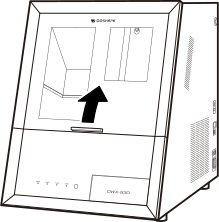
6. Open the front cover.
Lift the cover until it clicks.
7. Follow the on-screen instructions to clean each part.
Remove the milling waste carefully with the included brush. If the milling waste remains, it may affect the milling quality. Use the dust collector to suck in the removed milling waste.
CAUTION
Do not touch the inside of the ionizer directly.
To remove milling waste adhered to the ionizer, use a dust collector to suction and eliminate the waste. This method is recommended to ensure safe and effective cleaning.
Front
Clean the clamp (1).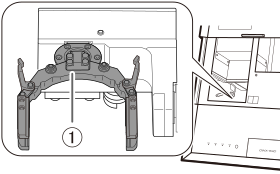
- Rear
Wipe off the camera cover with the included cloth for care. If it is dirty, the captured images will be indistinct, which may make it impossible to check the milling status and the situation when an error occurs.
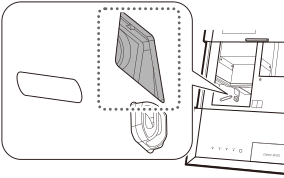
- Reverse side
Clean the reverse side of the clamp (1).
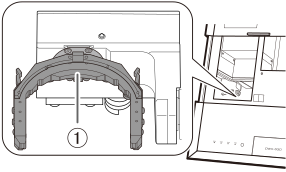
- Spindle
Clean the tip of the spindle. Also remove any milling waste that remains in the gap between the dummy pin or collet and the milling bur holder.
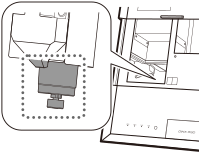
8. Close the front cover when you finish cleaning.
Gently pull up on the front cover and then lower it until it clicks.
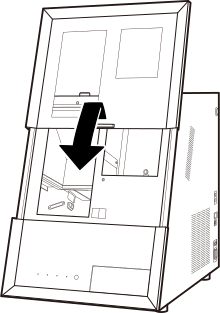
9. Click [Close].
10. Turn the dust collector off.
When using a dust collector with built-in linking function.
Closing the [Milling area cleaning] window in VPanel, the dust collector will be turned off automatically.NOTE
The dust collector can also be turned off by pressing the touch sensor on the built-in panel.
When using other dust collectors.
Turn the dust collector off manually.
Cleaning the Tool Area
Reference video
1. Check that the machine is in the ready status.
If the status light at the top of the machine or in the milling area is lit in blue, the machine is in standby.
2. Open the front cover.
Lift the cover until it clicks.
3. Clean the tool area.
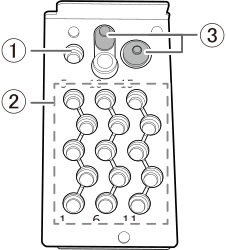
Use the included brush when cleaning. With the cloth for care, wipe away the milling waste from the dummy pin stocker (1), milling bur stocker (2), and around the milling bur sensor (3).
If the milling waste remains, it may affect the milling quality.
4. Close the front cover.
Gently pull up on the front cover and then lower it until it clicks.
Cleaning the Milling Bur/Adapter
Reference video
1. Wipe off any dirt from the gray portions indicated in the following figures with the cloth for care.
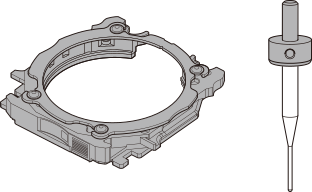
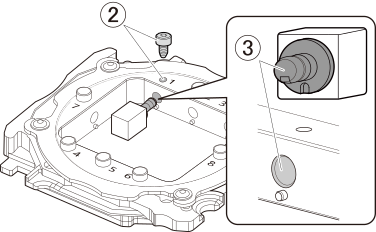
When using a pin-type workpiece adapter, carefully wipe off the securing screw section (2) and the pin insertion section (3). Exercise special care when cleaning the securing screw and the hole in which the pin is inserted because it is easy for milling waste to remain in these areas.
If the milling waste remains, it may prevent the material from being secured correctly and may affect the milling quality.
2. Store the milling bur and the adapter.
The milling bur in the milling bur holder can be stored in the bottom storage by standing it in the tool rack with it oriented with its circular holes on the top.
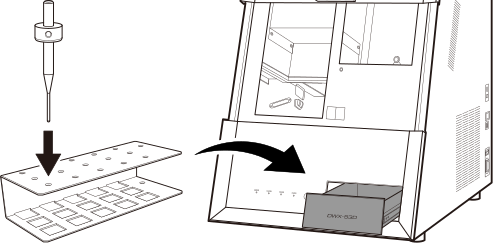
You can store unused milling burs in their cases by standing them in the tool rack with it oriented with its square holes on the top. In this situation, the tool rack will not fit in the bottom storage, so place it next to the machine.